Saturday, June 29, 2013

Snow White Cake Pops


Every mom on the face of this earth knows that when it comes to movies and children there is no such thing as "watching it once". Especially when your little one is 3 and the movie is Snow White.
My little helper decided she wanted to see Snow white , and then decided she wanted to see it again, and the day after she asked me to put the video one more time. All week long I watched Snow White
even when my daughter was not in the t.v room she cried when I turned it of...
I caught myself singing Heigh Ho in the shower, and in my car, whistling it in the morning and before I went to bed.

All this Snow White and the seven dwarfs inspired me to make this cake pops... I think they came out great!


snow white cake pops


My favorite is the witch , and the evil queen, well , Snow White is so cute too! 


snow white cake pops

Evil Queens crown is made of fondant and the witch cape too, I used a mini marshmallow as Evil Queens neck . Underneath the witches cape, there is a kiss chocolate, a sweet surprise that also 
gives that pointy shape for the cape.

Hey! I know I am not Bakerella, but I am very pleased with these! Besides, I made them with coffee cupcakes I made the other day and they tasted sooo good! ( wait for the coffee cupcake recipe) 
The best part is  my daughters reaction, She just cant believe her mother did that! her eyes light up and cant wait to try them. This time she was beside me while I took the pictures the whole time praising my cake pops!


snow white cake pops
´

Are your kids your biggest fans? The feeling is the best!


I can´t wait to have a Snow White party , there are so many good ideas for one ! and these cake pops are original and beautiful. 


Sunday, June 23, 2013

Vegan Double Chocolate Cupcakes Recipe


   Full of taste and perfect vegan chocolate cupcakes with a simple and basic recipe.
 
 I know, a vegan cupcake will never taste like a butter , egg, milk , buttermilk cupcake... If you agree , you havent tried this recipe yet.
A month ago I couldnt make any acceptable chocolate cupcakes , and now I am making vegan chocolate cupcakes... who knew!?


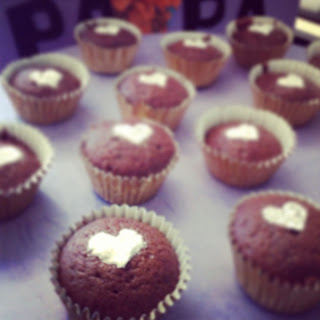
vegan chocolate cupcakes


My cousin asked me to make her some cupcakes , ( another bride and groom  cupcake batch!) but she wanted them vegan. I didnt make her any promises. I needed to find the best vegan recipe I could find, and I did! Now I will share it with you.

The original recipe was from Chow, the frosting recipe I did it on my own just from reading other recipes... sorry I don´t have a link for the original recipe, I promise I will find it for you later.

Note: Very very important! Do not try them the first hour... seriously! dont! In fact, make them a day or two before you serve them... they come out super pasty. Glue to your mouth, teeth and throat kind of pasty, I almost cried when I tasted them... they looked so beautiful! I then tasted them the day after, and they were much better, and the third day they were superbe! moist but firm and full of chocolate flavour.
I did some changes from the original recipe, I used coconut milk instead of soy milk and other little changes. But here it is a vegan recipe that will satisfy the need of chocolate of everyone; even the non vegan will love them!

You will need:

For the cupcakes: ( yields 12 cupcakes)

  • 1 cup coconut milk
  • 1 teaspoon apple cider vinegar
  • 3/4 cup granulated sugar
  • 1/3 cup canola oil
  • 1 tablespoon vanilla extract
  • 1 cup all purpose flour
  • 1/3 cocoa powder ( I used Hershey´s)
  • 3/4 teaspoon baking soda
  • 1/2 baking powder
  • 1/4 teaspoon salt.
For the chocolate frosting:

  • 1 stick good cuality margarine ( room temperature)
  • 2 cups icing sugar
  • 1/2 cup coconut milk 
  • 3/ 4 cocoa powder
  • 1 teaspoon vanilla extract
To make them:

In a large bowl mix the coconut milk with the vinegar and let it curdle while you take out your other  ingredients and do the rest of the recipe.
Preheat your oven to 350º and prepare your tin with the muffin liners.
Use a bowl to sift together  the flour, cocoa powder, baking soda , baking powder and salt . 
Now add the vanilla, sugar and oil to the coconut bowl and using a handheld mixer mix them together until very well blended. 
Add half  of the dry ingredients, mix for a minute, then add the other half, mix until there are no lumps. 
Fill your liners 3/4 and bake them from 18 to 22 minutes, or until your toothpick on the center comes out clean . Take out of the oven and let cool for a few minutes, then transfer them to the cooling rack until they cooled completly. 
Now comes the hard part... put them in a container without putting them one on top of the other and wait for a day, or two. ( I stored them on my mini oven)

Make the frosting minutes before you serve them, or it will get to hard to pipe. 

To make the frosting use a stand up mixer and beat the margarine until smooth, then add the icing sugar little by little. By the end you will have a lumpy horrible looking frosting, not to worry, keep on beating, add the milk, mix it a little using a spatula, with your hand, then add the cocoa, mix it a little by hand , add the vanilla and beat again with the mixer on a medium speed until all ingredients are combined. Is it too thick? add some more coconut milk ( a teaspoon will do it) is it to runny? add some more icing sugar... Enjoy!


vegan chocolate cupcakes


 A big standing ovation for all you vegans out there!!! Who said you don´t enjoy your food? 
Next time make them these cupcakes and shut them up!


Friday, June 21, 2013

Clown Cupcakes


  My best friend´s little boy is celebrating his first birthday today!. So my friend asked me to make some cupcakes for the special occasion.
Trepsi cupcakes! Who is Trepsi you ask? He is a very well known little clown here in Mexico that little babies love!! My 3 year old still sings Trepsi songs, and his fiend musi.
These were a challenge , being the first one ever, making this Trepsi cupcakes. But they were so much fun to make!. I think that all the planning and creativity you need to create a new cake is my favorite part of the whole decorating cakes thing.
Besides! I am getting a little bit bored with the bride and groom cupcakes that by the way I made more yesterday for another event! They are a total hit! and I am grateful to them because they had given me a lot of work, but they are not longer fun! So planing how to do this cute clown and his bird friend Musi was a breeze of fresh air in my kitchen! hahaha

I am proud to present Trepsi and his friend Musi...


cute right? , they have a baby gym that is totally famous where I live... 

and... these are my cupcakes! 


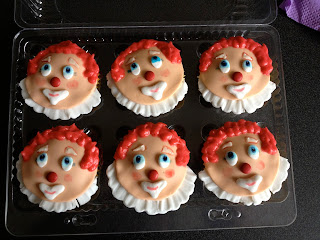
clown cupcakes


clown cupcakes

They are made out of fondant, the nose is a mini m&m. The cupcakes are banana with chocolate chips and turned out delicious!!!


banana cupcakes


These are the Musi cupcakes... I was planning doing them different, but my friend wanted them like this, I think they were cute too!


bird cupcakes

                       Made out of caramel frosting, with eyes and beak of fondant... To cute to eat!!!

So... of all this cake, cupcake , cake pop making... which part is your favorite part?
Do you mind doing the same cupcakes over and over ? or you enjoy the challenge?


Wednesday, June 19, 2013

Cupcake Presentation ... taking it to the next level


What a week Ive had! I felt on an episode writen by Shonda Rhymes! (Grey´s Anatomy, Scandal, Private Practice), My husband was mugged, thanks to God he is ok. , but the thieves punched him on the face.  Then he crashed his car, then he crashed mine! Now we have no cars, and the moral of the family is down. And the cherry on the top of the cake... Mexico had an earthquake! we normally don´t feel anything because we live on a house, but when we felt the earth shake beneath us we were very scared! All this things in a week or so!. The bright side? we are fine, all this bad things happened and we are perfectly fine ( my husbands cheek cant say the same) but we are ok.

  I needed a distraction, something good , and it came !
 A client called me, she needed 60 mini cupcakes, 30 vanilla brides, 30 chocolate grooms for her brother´s wedding event, she needed them wrapped individually and to take them in something acceptable for the event ( bye bye cardboard boxes), also, she wanted to take them to the event by herself ( so bye bye typical tray or they would fall ) ...

This meant Making 60 cupcakes in two days, no car to use if something bad happened (like I ran out of oil, which I did) with no help, and to make her something pretty ... My answer? Challenge accepted!

I baked the cupcakes the day before.. And disaster! They were huge! But I had no way of doing them again... So I prayed to have a good looking, great tasting product and kept working... I had to think of an idea to make the cupcake presentation, and my husband pointed me to an old basket on top the fridge .. How about that? ... Literally I could hear the bells and the haleluya on my head! I had some black fabric much like silk from my DIY days and felt. I covered the basket first with the felt using a silicone gun, then I covered it with the black fabric... Asked my hubby to bring me white ribbon and a white bow that I also atached using the gun. I barely made them on time but they were beautiful and I was very very pleased with them .

Part of the appeal of the cupcake is that they are beautiful, and in my opinion the presentation is part of that, the cupcake first enter the eye and then please the mouth. To make a good display all you need is imagination ( and a husband like mine, haha) , the possibilities are endless!

How do you think you could have done it?
How do you display your cupcakes? Please share ideas!


cupcake presentation,


beautiful cupcake presentation

cupcake presentation

wedding cupcakes

Sunday, June 16, 2013

Brownie Bites Recipe


Everyone loves brownies! Specialy if they are bite size so they make you keep wanting more... I made this for my husband, this recipe is so easy, even my little helper could do her job!

I know being a father is not easy, to allways have the well being of the family on your shoulders. I am very lucky to have a strong man beside me so we could raise our daughters together . This recipe is to endulge the men in our life who make it easier and so much better!. To my other half and the father of my children! I love you!

I only wanted to make 12 mini brownies, with a card that read; a sweet treat for a sweet man... I found this recipe on Health and it worked just fine. But if I ever do them again I will increase the chocolate amount ( just a bit) and put a little less cocoa. Here is the link to the recipe:

Health mini brownie bites recipe

And here are some pictures...

Happy Father's Day!


mini brownies, brownie bites, mini brownies cupcakes


brownie bites, mini brownies, brownie cupcakes


I made this cute little hearts out of icing sugar, but feel free to top them with pecans, coconut or what ever your heart desires!. Enjoy!


Friday, June 14, 2013

Make any store bought cake your own...


This time I want to share with you my very first attempt of making a cake with chocolate figures..

Ok. So today I cheated, I didn't had the time to make the cake I was planning for my daughter's first birthday, so I went to the bakery, chose a simple cake and added a few things I had for the cake I was planning... Hurray!!! Beautiful and special cake for my little helper's birthday...


cookie monster cake


The first birthday is a very special day!,  A unique little person is starting to show on that angel face and chubby cheeks. I wanted with all my heart to make her a very special cake, I thought Sesame Street would be an easy and cute first birthday theme. So I started on sunday, making modeling chocolate... 
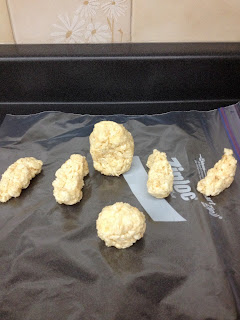
Finding the right recipe is so hard!!! this time , I used candy melts and followed a pretty standar recipe... the result was a rock hard chocolate  that I had to microwave to start using, but hey! I could use it! not so bad for me! I made my rice Kispies figures ...

cookie monster cake

and I tried to make the figure...

cookie monster cake

I don´t know if you can see that I tried to make like fur with a toothpick... huge mistake! I didn´t like the overall efect but my hubbie liked it so I left it that way.

And that´s it! I had no more time to make more figures, no time to bake, and had no money for fondant... But I allready had the cookie monster figure, so I decided to buy a cake and make it my own ...I was very pleased with the results. 
It is the first time I made modeling chocolate, the first time to make any figure using rice krispies, and my first time making any modeling chocolate figures! 


cookie monster cake


What do you think? Be kind! Modeling chocolate is Not Easy!

If you ever find yourself in a situation like mine, don´t hesitate and run to buy a cake, and then make it your own! it can be with fondant, candy melts, modeling chocolate... the limit is your imagination! Even if you didn´t bake the cake, it will have a personal touch and everyone will enjoy it.

I leave you with the picture of my angel with her cake! It is allways a great pleasure to see your little ones grow... I am so proud of my two daughters!


Yes, she has a tiara! it was her birthday! So give me a break!


Monday, June 10, 2013

Tips for making the perfect cake pops


  Making cake pops... piece of cake, right?.
You go ahead and by your candy melts, make your cake balls, dip them in your melted chocolate, and then, before you could even show them to your family,  they are on the floor, or leaking, or cracked... you try to figure out what happened... Go on line and read all you can about them, you did everything like you were supposed to.. or not?
I  have made cake pops for a while now and have learned a lot from my mistakes, so hopefully if you read this you can learn from my mistakes too.
Here are some great tips too if you are making characters cake pops, those are my favorites!

1. If you are making characters , make sure to be inspired by a toy or a tree dimensional figure, not a drawing, this way is easier (trust me) to figure out the details of the character in question. My secret are bubble heads!, yes! they have the perfect shape to study the face you want to make.

2. While making your cake balls , make sure to press firmly enough the cake portion before you make the ball, press , press , press , each time with less presure, then make your ball as you are used to. This will help to blend even better the frosting with the cake, and make your cake pops stronger.

3. Keep it simple, in an attempt to make the perfect cake pop, you can come with an idea that requires a lot of candy, or fondant, or what ever... don´t. keep them as simple as you can , and if you do them correctly, they will look awsome without all that candy on them. Try to shape the cake ball instead of adding candy... that take us to number 4...

4. Use cookie cutters or even your fingers to achieve the desired shape.  Be creative, for instance.. to make the swiper shape, I used a nozzle.. and then reshaped them with my hands.

5. If your shape is a little fragile make sure to dab the cake pops with melted chocolate before you insert your lollipop sticks. I made this with the flounders noses, and the swipers muzzles. using a toothpick and very little candy melt I dabbed to prevent future cracking or melting or other calamity. This is good too, if your cake balls have cracks, just dabb some candy melt in the cracks and leave it to dry completely before you insert the stick in them.

6. Leave them on the fridge for a while. If you allways leave them 30 min. , this time leave them 50. Specially if you are making characters cake pops.

7. This is very very important to prevent candy melt cracking and oil leaking!!! ... You left your cake pops for 50 min on the fridge, now take them out and leave them 30 min. at room temperature before making anything to them!. When 30 min. have passed, then you can dabbed them , and then you can insert your lollipop sticks.  When your cake balls are "warming up" they expand, if you dip them to soon in candy melt they will keep expanding and will crack your beautiful candy melt coating.

8. Tap Tap Tap, and then tap some more. While dipping your cake pops, give them some tough love. They are much stronger than you think! ( and if they are not, then they were going to crack anyway)
tap them to prevent air bubbles that may cause oil leaking and cracking. if you spot one bubble who refuse to go by taping, just poke it with a tooth pick, then tap some more to make the imperfection go away. Tap tap tap your way to perfect beautiful cake pops!


This is what I learned , when I do not follow these steps the results are allways bad.  It works for me and now I hope it works for you!  Don´t doubt to show me your new and perfect cake pops! Please share them with me!

I leave you here pictures of my cake pops... ( my blog is new so I don´t have much)
how to make cake pops


"how to make cake pops"

how to make cake pops


"how to make cake pops"


Saturday, June 8, 2013

Dora the Explorer birthday party


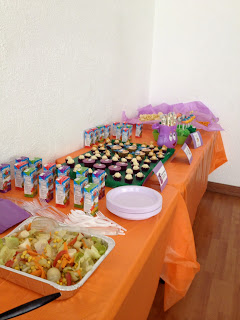
    After days of hard work, my little helpers thirth birthday party is finally over! And I am very proud to tell you it was a succes!. All the kids had a huge smile on their faces all of the time, everyone enjoyed the cupcakes and food, and my table Dora the Explorer style looked very pretty.

Latlety all the birthday parties look amazing, is like a competition between us moms to win the best party prize. I blame pinterest, with all that mouthwatering images and those DIY projects.
Well,  here are some pictures if you want some inspiration, here is what I did...


Dora the explorer party


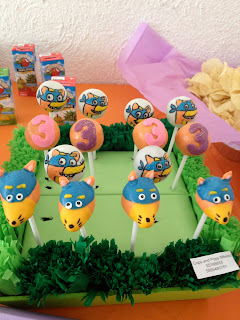
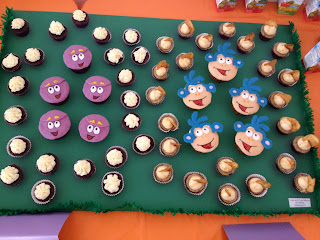
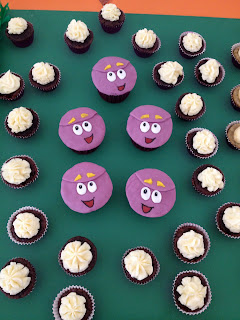
Backpack cupcakes are chocolate with cream cheese frosting , and boots cupcakes are banana cupcakes with caramel frosting, I do not have many pictures because they went pretty fast.

swiper cake pops , dora the explorer cupcakes, boots cupcakes, backpack cupcakes

swiper cake pops... a total hit! I am very proud of myself for these.
I saw on pinterest the idea of painting mozarella cheese strings like maps, and I put them in the backpack toy.

swiper cake pops, cake pops, birthday cake pops, dora cake pops

they were so much fun to make!

swiper cake pops


dora the explorer cupcakes, dora cupcakes, boots cupcakes, dora party


boots cupcakes, dora the explorer cupcakes


backpack cupcakes, dora the explorer cupcakes, dora cupcakes, dora party


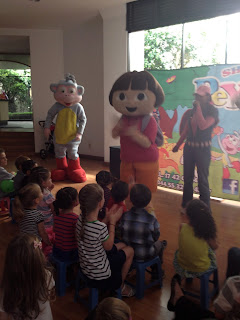
We even had a Dora Show!

dora the explorer birthday party

and how could we forget the cake?

dora the explorer cake


It was hard work and a very stresful week, but when I saw the look in my daughters face and the rest of the children, it was all worth it! I can´t wait to next year!

Friday, June 7, 2013

Banana mini cupcakes and caramel frosting recipe


   Today I will share with you one of my greatest recipes ever... my recipe for banana mini cupcakes and caramel frosting. Every time I make them I get compliments and great reviews. So if you are in a sweet tooth mood or want to make delicious mini cupcakes for a party, look no further , this recipe is for you!.

So easy and tasty you will want to bake every party you have!

I made this today for my daughter´s birthday party and the were very popular...


banana mini cupcakes


boots cupcakes


Yes, I made boots cupcakes too and backpack cupcakes, but that is another blog... Yummy right?

Recipe for Banana Minicupcakes:

Ingredients:

  • 1/4 cup all purpose flour.
  • 1/2 cup whole wheat flour.
  • 1/2 teaspoon  baking soda.
  • 1/2 teaspoon baking powder.
  • pintch of salt.
  • 1 and 1/2 riped bananas mashed.
  • 1/3 cup white sugar.
  • 1/2 egg previously beaten by you with a fork. (just mix the whole egg in a cup and then keep the half, and beat with a fork for a bit)
  • 1/2 oz. unsalted butter at room temperature


Procedure:

Preheat your oven 350º . Prepare your liners in your tray. 
In a medium bowl sieve your flour, whole wheat flour, baking powder, baking soda, add salt. 
Cream the butter and bananas together (if your butter was not soft enought beat it first, then add the bananas) , add the sugar, keep beating at medium speed, then add the egg (or half of it).
Stop, and at slow speed , little by little add your flour mix. just keep mixing until all is well blended.
You will have a very thick mix. Not to worry, perfectly normal, you are 10 minutes away from perfect minicupcakes!

Fill your liners 1/3 , 1/2.  Bake for 8 to 13 minutes or until the toothpick comes out clean. 

In my oven they were ready at 12 minutes. 

Caramel Frosting:

  • 1 oz. butter room temperature, almost melting
  • 2 oz. cream cheese
  • 3 table spoons of caramel, I used smuckers, but you can make your own or use what you know.
  • 2 cups sieved icing sugar
  • milk ( just use a teaspoon if you think the frosting is too thick for you) I like it very thick.
Beat the butter on a medium speed for 1 minute, then add the cream cheese, beat until they are perfectly blended and can´t tell them apart. Add the caramel, then at a very slow speed add your sugar , one spoonfull at a time until blended. If you think is very thick, add the teaspoon of milk.

And this is it! pipe away the way you like and use anything you like to make them pretty. I drizzled them with more caramel and use a banana chip. 
Enjoy the compliments and remember me when you do.